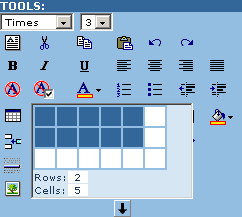
1. To insert a table in the content of the INFO, push the cursor at the point of the content you want to integrate the table and click the Insert Table button . Set the number of rows and columns.

2. To format a table select the table by placing the mouse over the border until the cursor turns to a cross.
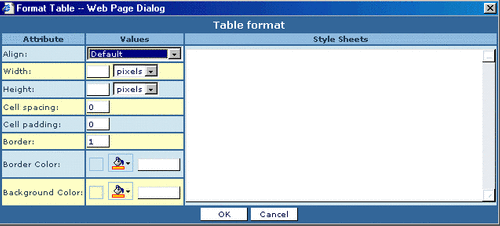
Select the Format table button  . A dialog box appears.

You can then:
- Align the table
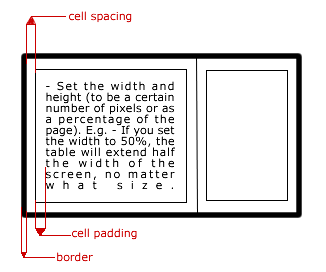
- Set the width and height (to be a certain number of pixels or as a percentage of the page). E.g. - If you set the width to 50%, the table will extend half the width of the screen, no matter what size.
- Specify the cell spacing (the amount of space between the borders of the cells, cell padding (the amount of space between the actual content of the cell and the cell border), border width and color, background color.

If you set the table border to 0 you can use the Visible Borders button to view the table. In this case the borders will not be visible on the site but only in Face Control.

